ipython ubuntu Anaconda
Updates:
7th January, 2016 - changes made according to new Anaconda distribution (v2.4.1) which contains Jupyter Notebook.
Note: The update to the video tutorial is still in progress so please don't refer it for now. Once, I have updated it, I'll remove this note from here.
I hope everyone is familiar with the AWS (Amazon Web Services) and how to use iPython (Now Jupyter) Notebooks. If you are not familiar with Jupyter Notebook and you work with Python, then you are definitely missing a very important tool in you work. Please go through this video which is a short tutorial on iPython (Jupyter) Notebook.
OK, to begin with, I'll list all the steps to create an Jupyter Notebook Server on an EC2 Instance in a step-wise fashion. I have also created a Youtube Video for this post, which you can check it out here.(update in progress to the video. please don't refer it for now)
The reason for deploying Jupyter Notebook Server on AWS is to access all my Notebooks from anywhere in the World, just using my browser and also be able to work with them.
Enough of talking, let's begin:
1. Login to your Amazon Management Console. If you don't have an account yet, you can create one for it. You get 1 yr of free access to some of the services, which you can check out at this link
2. Create a new EC2 Instance with Ubuntu. If you are not familiar with how to create an EC2 instance, you can check out the video of this blog, in which I go through the steps from the beginning.
3. The important thing to remember while creating the instance is to assign the security group settings as mentioned in the image below
- First of all we are going to use Anaconda Python Distribution for installing all the required Python libraries. This is a free distribution and we are going to use the Linux version of it. Remember to verify the latest version of the distribution from the site. This blog is updated to reflect the changes in the latest Anaconda distribution - 2.4.1.
$ wget https://3230d63b5fc54e62148e-c95ac804525aac4b6dba79b00b39d1d3.ssl.cf1.rackcdn.com/Anaconda2-2.4.1-Linux-x86_64.sh
- Next we will bash to run this .sh file. You need to accept the license terms and set the installation directory for the anaconda distribution. I use the default one only, which is "/home/ubuntu/anaconda2/". Also, it asks you to add the default path of anaconda python to your .bashrc profile. You can accept to do it or add it manually.
$ bash Anaconda2-2.4.1-Linux-x86_64.sh
- Now you need to check, which python version you are using, just to confirm if we are using the one from Anaconda Distribution or not. You can do this by using
$ which python
This will list the python your system is currently using. If it does not mentions the one from ".../anaconda2/..." folder, then you can use the following command to re-load your.bashrc, so as to set the correct python$ source .bashrc
- Open the iPython Terminal to get an encrypted password so as to use it for logging into our iPython Notebook Server. Remember to copy and save the output of this command, which will be an encrypted password, something like "sha1..."
$ ipython
In [1]:from IPython.lib import passwd
In [2]:passwd()
and exit out of ipython terminal using "exit" command. [ I'm not gonna use this password(shown in the pic below), so don't waste your time trying to copy and use it. ;) ]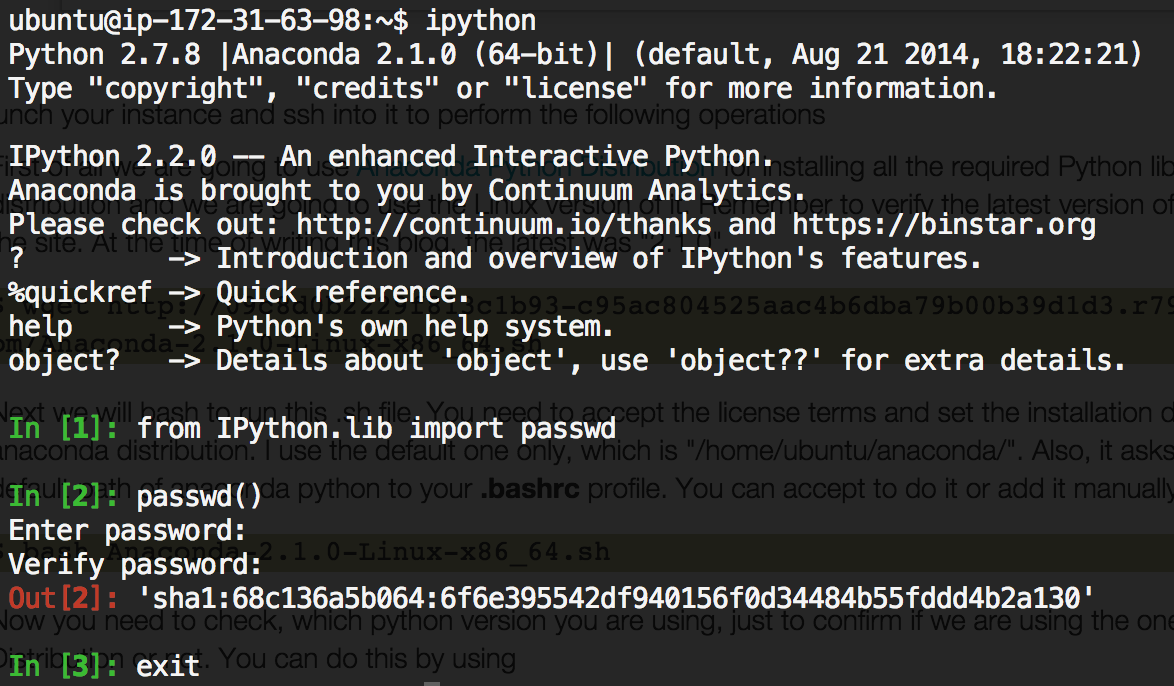
- Now we're going to create the configuration profile for our Jupyter Notebook server
$ jupyter notebook --generate-config
- The next thing is going to be to create a self-signed certificate for accessing our Notebooks through HTTPS
$ mkdir certs
$ cd certs
$ sudo openssl req -x509 -nodes -days 365 -newkey rsa:1024 -keyout mycert.pem -out mycert.pem
it will ask some questions, please answer them to the best of your knowledge as some of them are required to successfully create the certificate. - It's time to change the config settings of our server
$ cd ~/.jupyter/
$ vi jupyter_notebook_config.py
You will see a long list of configuration settings. You can go through each one of them and uncomment them as you like, but for me I know what I want, so I'll add the following settings to the top of the file and leave the rest commented as it is.c = get_config() # Kernel config c.IPKernelApp.pylab = 'inline' # if you want plotting support always in your notebook # Notebook config c.NotebookApp.certfile = u'/home/ubuntu/certs/mycert.pem' #location of your certificate file c.NotebookApp.ip = '*' c.NotebookApp.open_browser = False #so that the ipython notebook does not opens up a browser by default c.NotebookApp.password = u'sha1:68c136a5b064...' #the encrypted password we generated above # It is a good idea to put it on a known, fixed port c.NotebookApp.port = 8888
- We are almost done. Now its time to start our Jupyter notebook server. For this, first I'll create a new folder which will store all my notebooks
$ cd ~
$ mkdir Notebooks
$ cd Notebooks
and now I'll start my notebook server$ jupyter notebook


$ nohup jupyter notebook
This will put your server process as no-hangup and will keep it running even if you close the ssh access to the instance
$ lsof nohup.out
which will list the PID of the nohup process which is running(if any).
Then you can use the kill command to kill this process and stop your ipython notebook server.
$ kill -9 "PID"
replace "PID" with the ID of the process you get from the "lsof" command.
So, that is all you need to run an iPython Notebook on AWS EC2 instance. Please leave your comments about this blog post and do remember to check out its video.(update in progress to the video. please don't refer it for now)
Until next time... :)